Dieter Rams designed the T1000 for Braun back in the early 1960s but like many of Ram’s designs it still looks modern — a classic radio icon. Much has been written about the T1000 and its later CD version, popular with diplomats wanting to keep in touch with home news while posted abroad. With multiple wavebands including all the shortwave frequencies from 1.6MHz to 30MHz it enabled international communication long before the internet.
I found this Braun T1000 CD at Audio Jumble which if you like hunting for retro audio technology in the UK should be on your annual pilgrimage list. In March this year it was held at the K2 centre in Crawley and you need to arrive early to find parking on site as it’s a popular event along with the usual weekend leisure centre visitors.
As with many T1000’s that have a detachable front cover to prevent damage during transport, mine was missing. The seller had thought to bring along a set of 8 D cell batteries to demonstrate the radio’s capabilities. Unfortunately there was only an odd crackle but I could not resist taking it on as a challenging restoration project. It’s still in the queue as I write this three months later!
In this post I’ll run through the T1000 CD’s features, its design and what I think is good and not so good about the radio. Bearing in mind the radio is now, in 2025, is over 60 years old, I feel a critical retrospective look is worthwhile, but tell me what you think in the comments below.
I’ll follow up this post as the restoration progresses later this year.
What I like about the design
A communication receiver must have clear sound with minimal distortion and sibilance and the T1000 delivers it. Speech has a nice tone and on FM music sounds well balanced from the elliptical speaker. However good the radio’s electronic design is, it needs to be easy to operate. So let’s consider the overall design.
Control placement
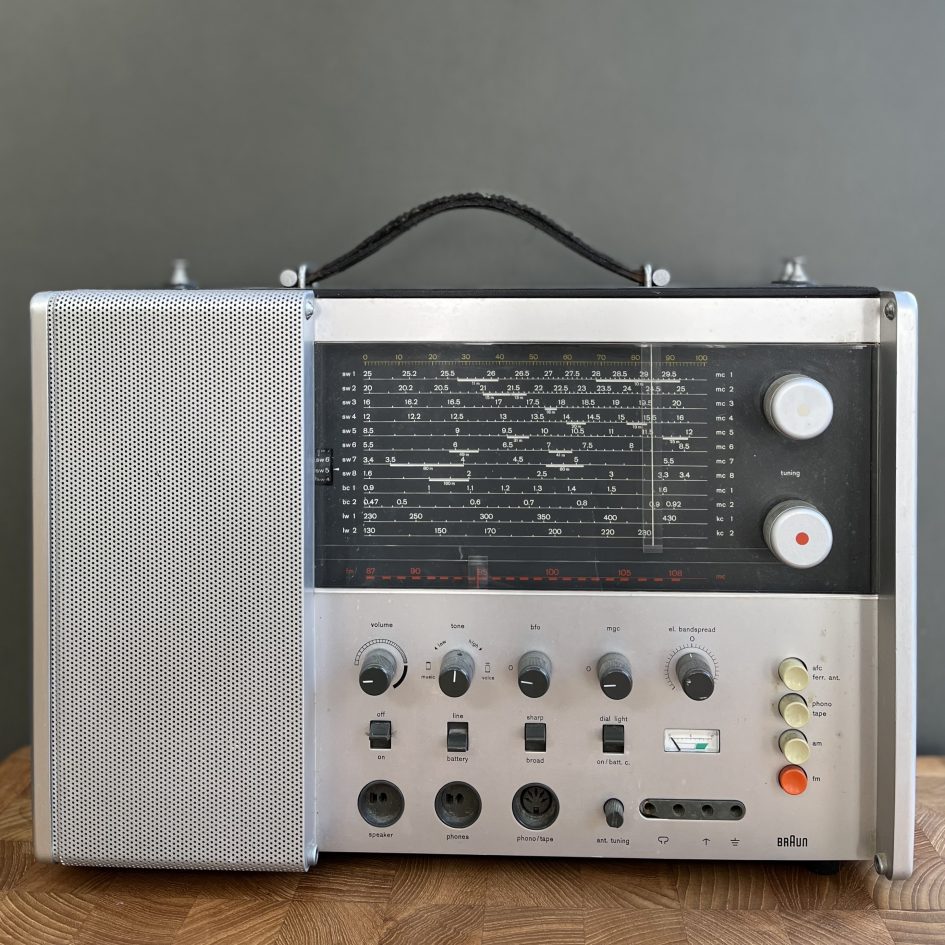
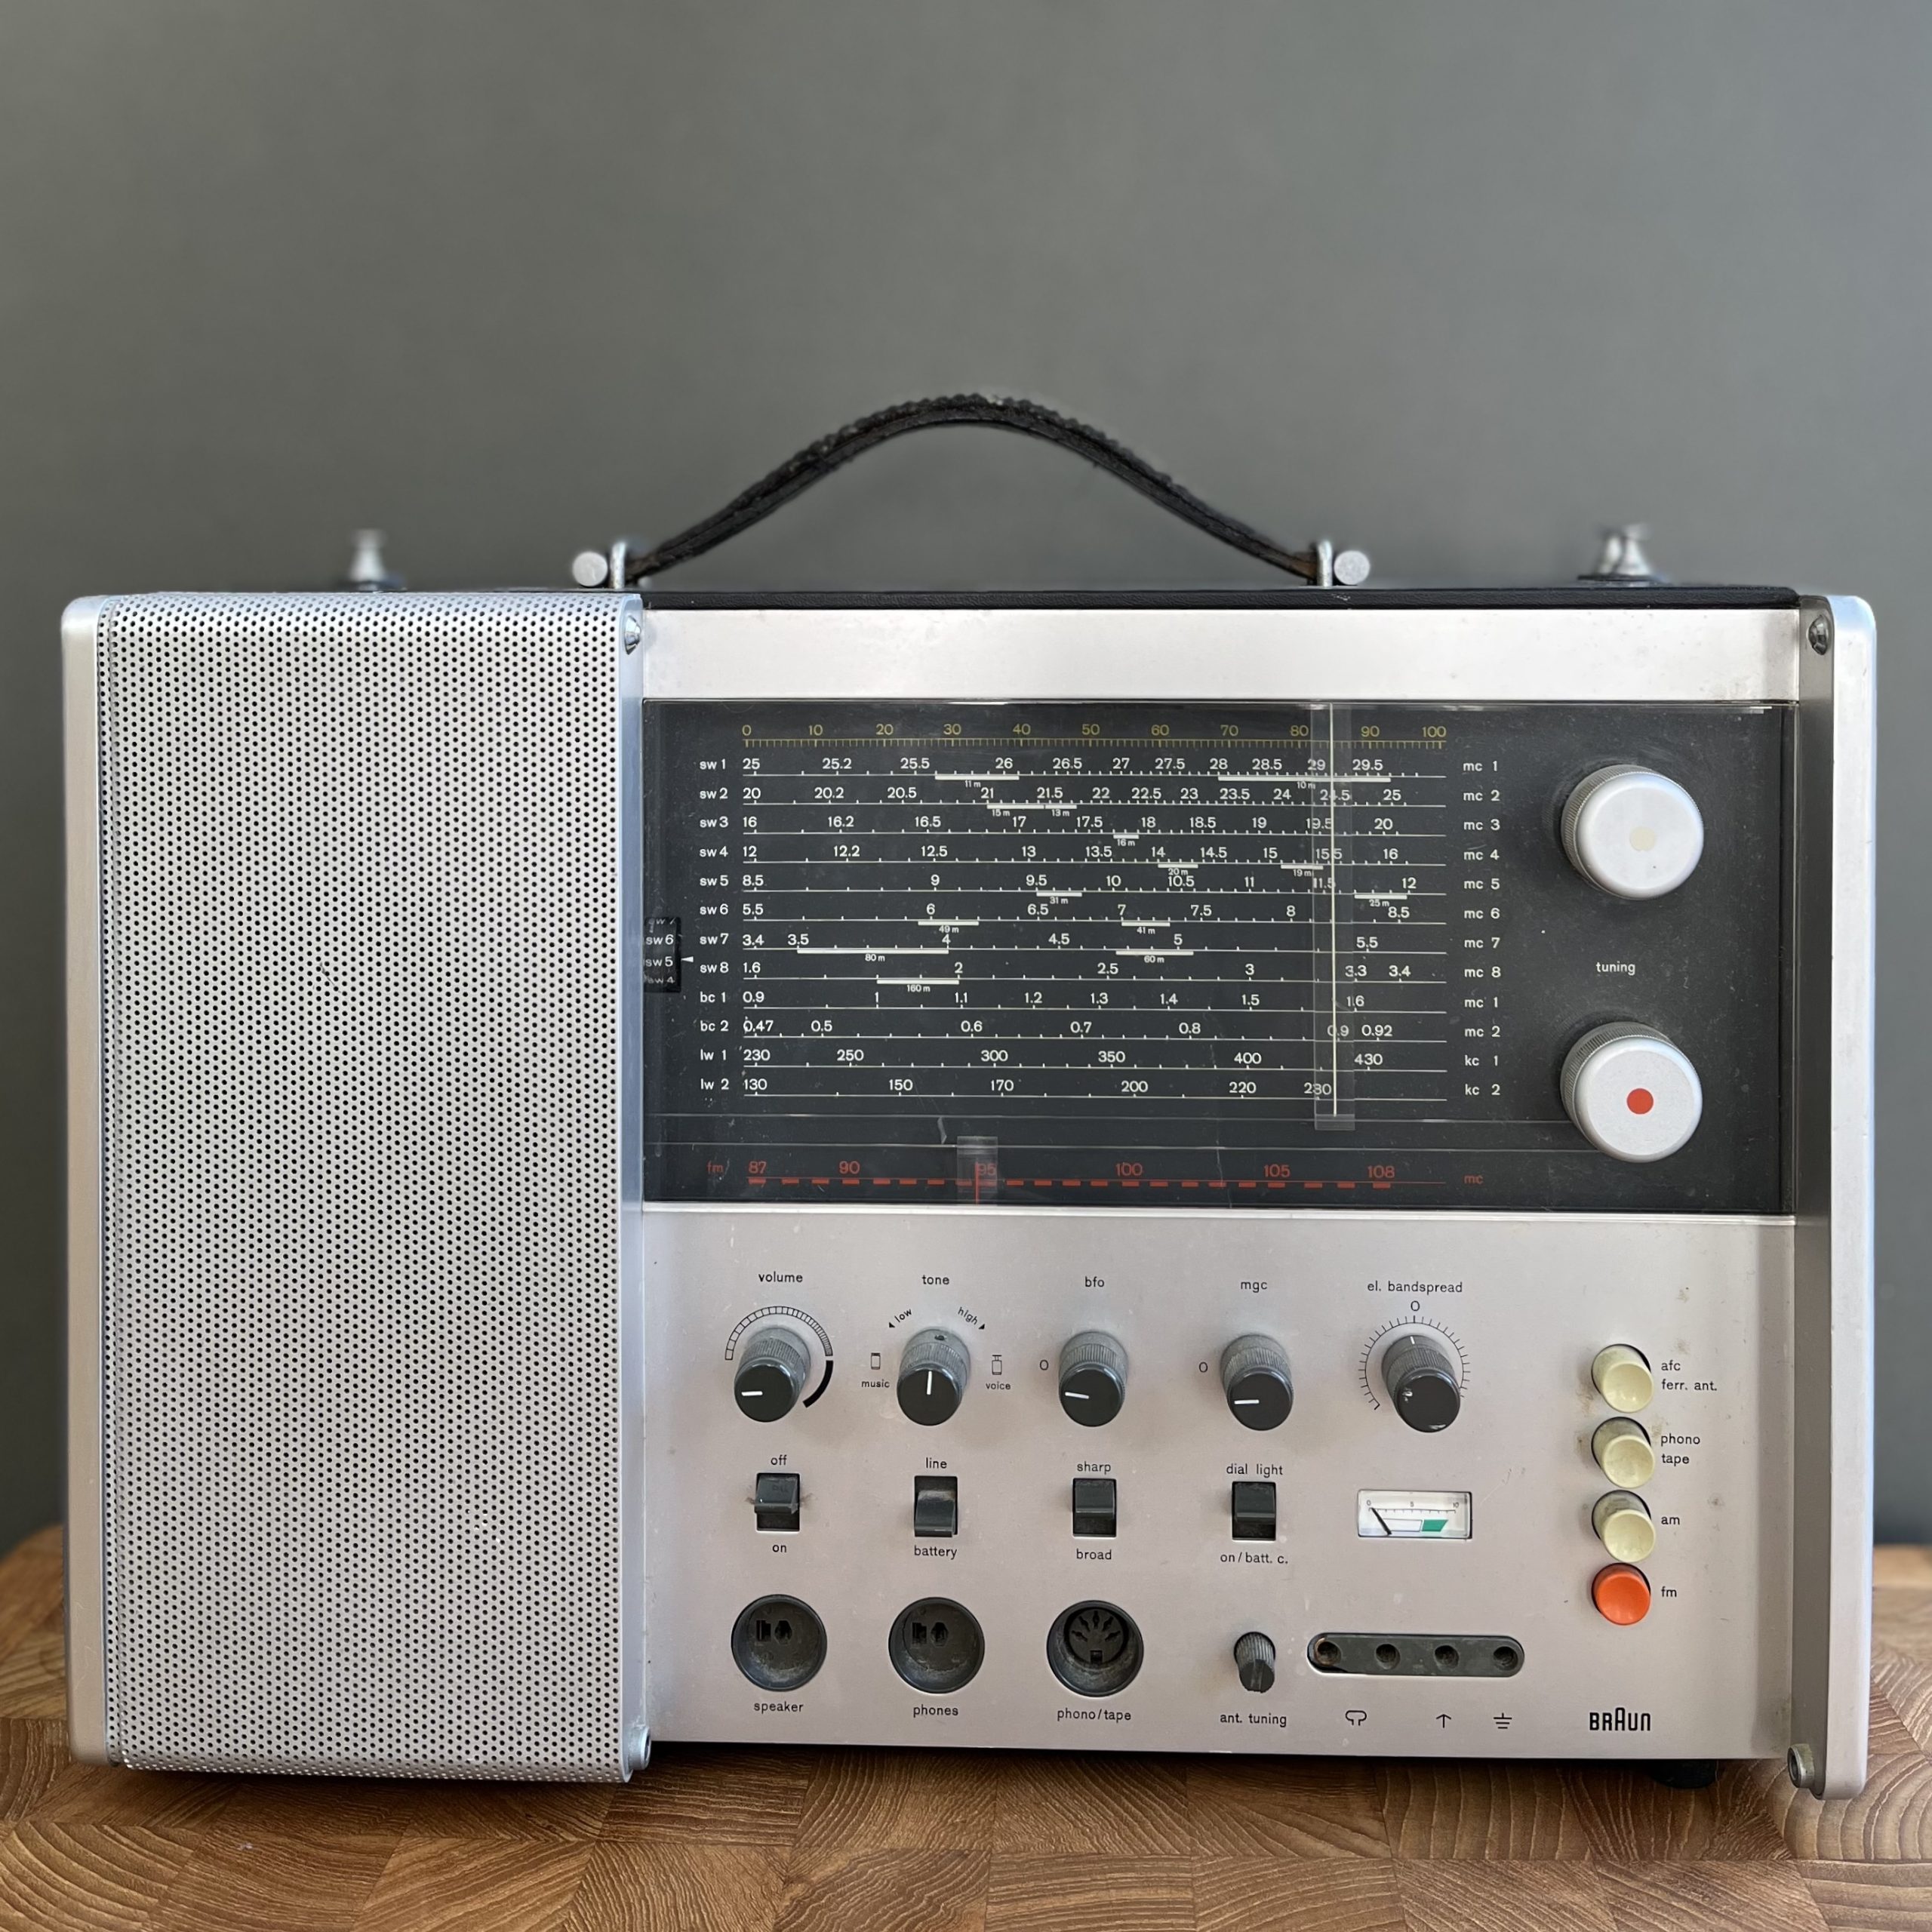
Control layout is for the most part ergonomic, if you understand a western language. You use the controls from left to right — much like you read a sentence and then from top to bottom. So you find the volume control and on/off switch on the top left and then the next most frequently accessed controls to the right.
But why are the two tuning controls sitting on the top right? I suspect Ram’s thought about using two hands when searching for radio stations and decided the left hand can control volume while the right changed frequency. It makes sense. As you step across the waveband on shortwave, signal strength varies so you need close coordination between volume and frequency. By keeping the volume and tuning apart neither hand obscures the frequency dial.
And why have a separate control for FM tuning and AM? Well Dieter had that thought through too. Separate controls allowed you to tune into a local FM news channel and quickly switch to a short wave band and return to FM without having to retune either. A simple idea that elevates the radio from an entertainment device to a professional workhorse.
Frequency dial
The tuning dial reflects Ram’s logical mind with each of the twelve wavebands grouped by frequency band and numbered corresponding to the wave change control on the right hand side. More on this in what I don’t like below. You could argue starting with the highest frequency bands on top and decreasing as you run down the list is counter intuitive. Why not run from lowest to highest frequency? After all the frequencies increase from left to right across the dial.
Again I suspect waveband usage is what dictates the design ergonomic here. The short wave bands will be the most sought after so Rams wanted these to be grouped at the top. Placing them in descending frequency order in bands from 1 to 6 allowed the medium and finally long wave bands to fit neatly in place. And wavelength in metres, which is inversely proportional to frequency, does ascend although it’s not shown on the dial.
A nice touch is the red colour coding for the FM waveband lettering and its tuning dial with a red spot. This is echoed in the red push button to select FM from the AM bands on the bottom right hand side.
User needs
Attention to detail is apparent when you take a closer look at the T1000’s design — detail which can only be achieved by a true understanding of the product’s use and user in mind.
Take for example the row of control knobs starting with the volume. You may notice the last control has a different cursor marking which is closer to the facia than the rest. Why bother to upset the aesthetic symmetry and manufacturing ease of simply having all the same?
Well the control’s function allows a fine tuning frequency and a rotary scale indicated the shift left or right of centre. So the knob’s cursor sits adjacent and allows the user to note tuning offset with ease. If the cursor was further away as on the volume control it’s much harder to see. Yes, the volume also has a rotary scale so could benefit from a closer cursor but sound level is less important than finding the right signal and re-tuning to it.
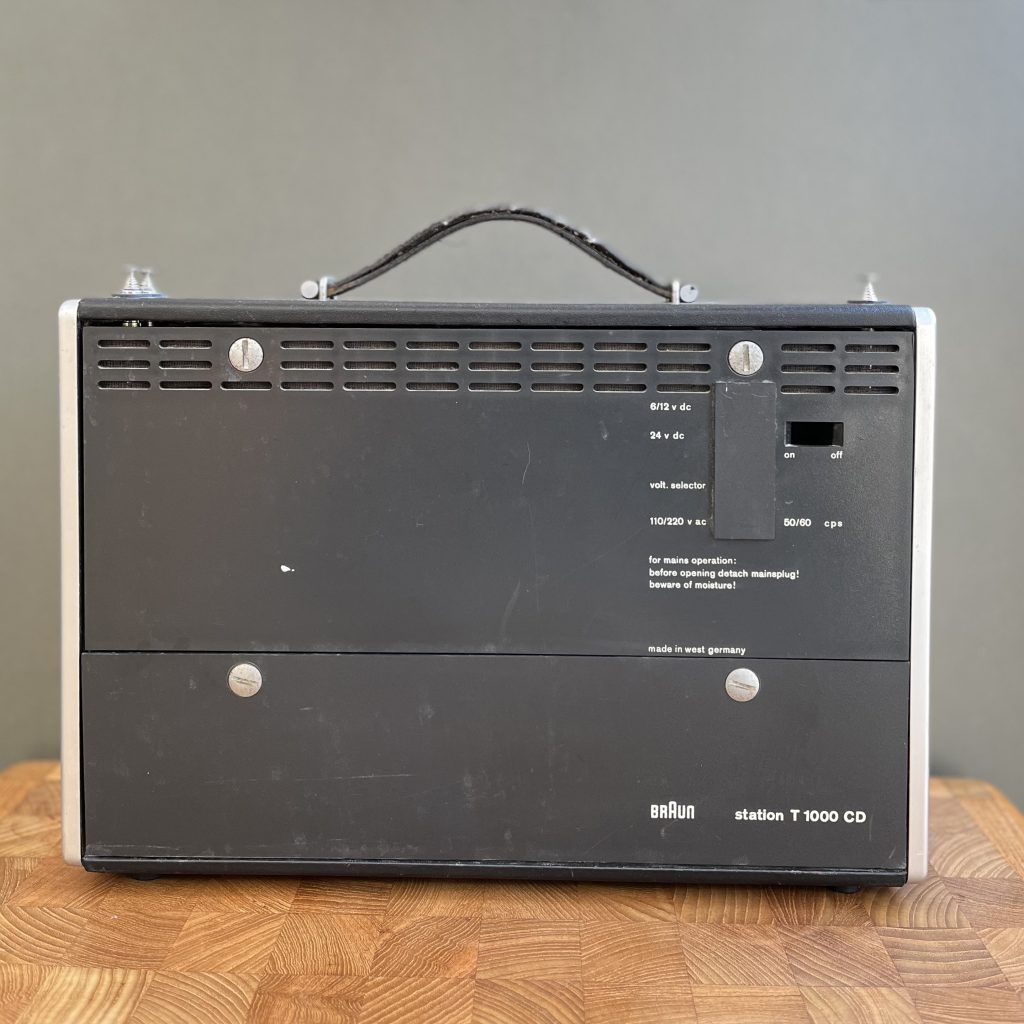
User needs are also apparent when you look behind the radio. Open the battery compartment and you find a separate cell dedicated to power the dial light. Why add the extra complexity? Separating the radio’s power supply from its illumination ensured using the light would not affect the all important receiver. The light’s battery can discharge and communication continues. Remember incandescent bulbs are power hungry and the designers didn’t have the luxury of modern low power LED illumination.
Aerial selection
Ergonomic design continues with the radio’s essential equipment – its telescopic aerials. On the right side are a dipole pair to optimise FM reception on VHF. While to the left, a single telescopic antenna improves signal strength on the SW bands by supplementing the internal ferrite rod. You may wonder why have both sets when the FM dipole could be used for SW – after all you can’t listen to both wavebands at the same time.
Again, I suspect the user’s needs won over engineering efficiency by retaining precise alignment for optimum FM reception via the dipole and allowing a different position for the best shortwave signals via the separate aerial. This makes it easy to switch between FM news and a home language SW transmission without having to fiddle with aerials.
External sockets for both wavebands avoid the telescopic aerials altogether when the radio is being used in a fixed location. Positioning the aerial sockets on the front, rather than more usual rear panel, suggests these could be connected and removed frequently — perhaps hinting at the espionage use cases others have written about. All quickly hidden away by the large aluminium front flap.
Power supply
Back in the sixties it was also possible to power the T1000 CD from rechargeable NiCad cells or from mains power using a separate TN1000 adapter. This could also charge the NiCads. You might be lucky enough to find one fitted to your T1000. If not they are as rare as hen’s teeth.
What I don’t like
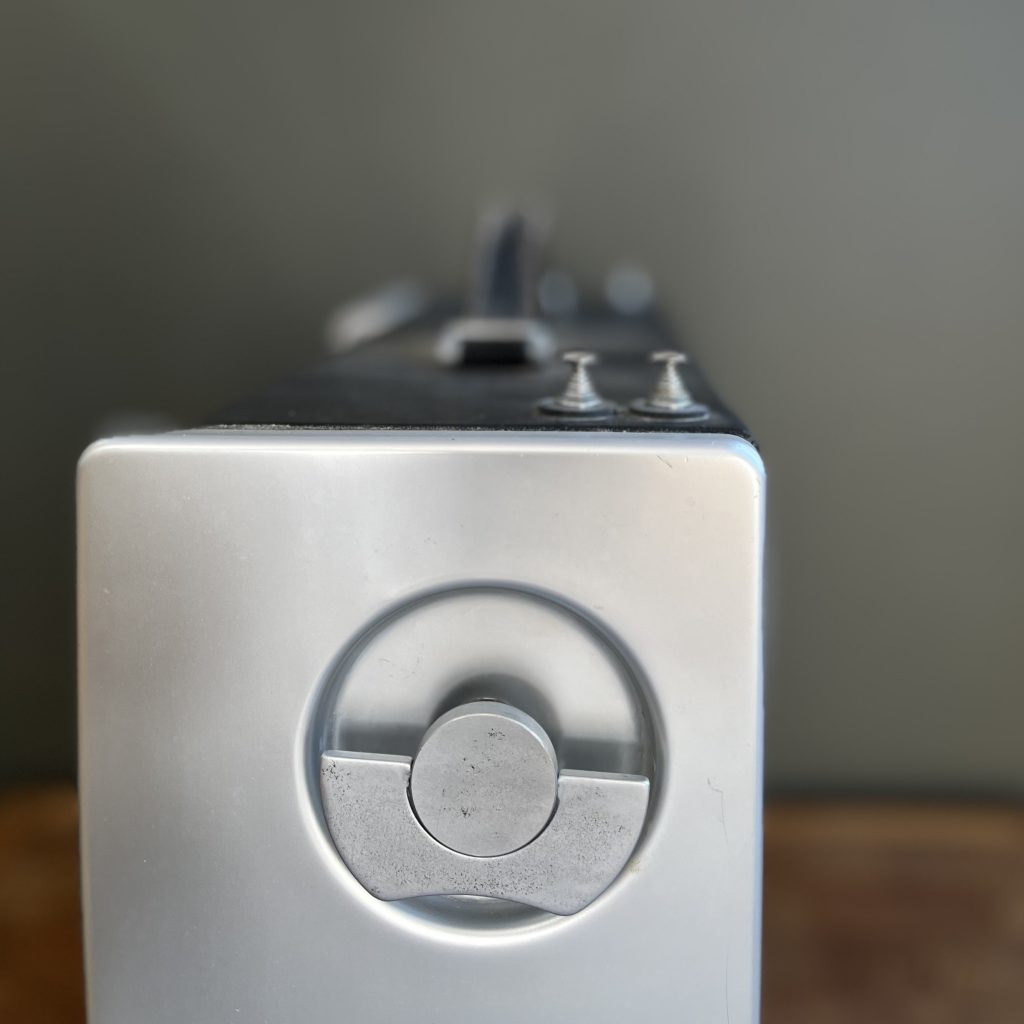
While elegant aesthetically, the wave change control is awkward to flip-out from its recess. My fingers find it difficult to move and the whole knob pulled out rather than flip. Maybe the spring tension is too high or the recess is too slight but it fails my ergonomic test for easy use.
Weighing in at over 8.5kg without batteries, it’s a crime the T1000 CD didn’t come with the TN1000 power adapter as standard fitment. You may argue customers would more likely power a portable radio using batteries. I’d argue 8.5Kg is not really portable and even with a low weight aluminium case, internally, Braun selected steel to manufacture its core components. I guess design compromises were inevitable to produce an economically viable product.
In truth there’s little to dislike about Ram’s product design. The radio’s limitations can only be found when compared to a true communications receiver where technical performance is paramount. Here a double superhet, to maximise sensitivity and selectivity is what’s required and what Braun’s design lacks.
The inclusion of a beat frequency oscillator or BFO for AM use equips the radio for single-side band transmissions favoured by ham radio enthusiasts for power efficient communication. The oscillator replaces the missing carrier frequency that’s saved with SSB modulation. I mentioned control’s cursor design and helps the precise frequency adjustment required. But there’s no upper or lower sideband selection as you may find on a true communications receiver. As the T1000 CD includes SW bands above and below the 10MHz where the upper and lower side bands are used this does seem an oversight.
Transistor technology
I should also mention the circuitry uses germanium transistors throughout both RF and AF stages. Germanium semiconductors have largely been replaced by silicon, so it’s difficult to source replacement devices should faults occur. Fortunately, Braun avoided the AF117 transistor series that are plagued by tin whisker problems.
Germanium transistors were replaced by silicon for a good reason – operating temperature. If the junction temperature exceeds around 75℃ the transistors can self destruct so those in the audio stage – where higher operating currents can flow, often fail. It’s surprising Braun didn’t select silicon devices for the T1000 CD given it was in production from 1968 to 1970 when suitable replacements were already available.
On last niggle. There’s no indication the radio is switched on apart from the position of the small toggle switch. Without a combined off/off switch and volume control, it’s easy to turn the volume right down for example, while taking a phone call and forget to switch the radio off and drain the 8 D cell dry batteries. This can be an expensive mistake.
The dial light
The faults
- Tone control intermittent
- Wave change knob loose – pulls out
- Wave change switch crackly / intermittent
- Shortwave, MW and LW tuning jammed
- Sharp / broad switch crackly / intermittent
- BFO control crackly
I’ll be looking at how to repair these issues in the next post.
Useful links
Here are the links referenced as at June 2025.
- UK’s Audio Jumble – https://www.audiojumble.co.uk
- Braun T 1000 CD Operating manual – https://archive.org/details/manual_T1000CD_SM_BRAUN
- Braun T 1000 CD Technical Details – https://www.radiomuseum.org/r/braun_t1000cd.html
18/01/2026 at 7:02 pm
Hi i came across this article and i need some help regarding a Braun T1000cd that i have im looki g for the 180cm antenna as mine is broken i am from india and no parts available here can you help guide be to some stores or suppliers in europe or UK where i can get this thanks
19/01/2026 at 10:10 am
Best source of Braun T1000 parts are from other T1000s being sold for spares or repair. These are listed occasionally on eBay .uk and .de at prices that reflect the rarity. Telescopic aerials are often broken so finding one is very difficult. As you say Braun used a very long antenna for the shortwave bands and these are also as rare as hen’s teeth. I checked all the spare telescopic’s I’ve acquired over the years and the longest is just over 1m.
There were a few multi-band transistor radios manufactured in the seventies from Japan and Honk Kong with brands such as Audiotronic. These were taller than wider (portrait aspect) and had longer telescopic aerials inside for shortwave. These could prove a possible source of a replacement.
Practically, I’d cut a length of sleeved flexible wire and use a 4mm banana plug to use the external socket or connect a crocodile clip to attach to the broken aerial. Sony supplied a wire aerial on a rotating reel for their ICF 7600 series which offers another solution for portability. This had a sleeve that simply placed over the telescopic aerial to boost signal reception.
19/01/2026 at 11:03 am
Hey Rick I reaall appreciate the prompt and detailed repy to my issue i will surely look out for stuff on ebay and have freinds and family in U.K and Germany that can help pick it up And have it sent to me if not i will opt for the 2nd option and reppair it with other compatibles spares thanks once again have a great day