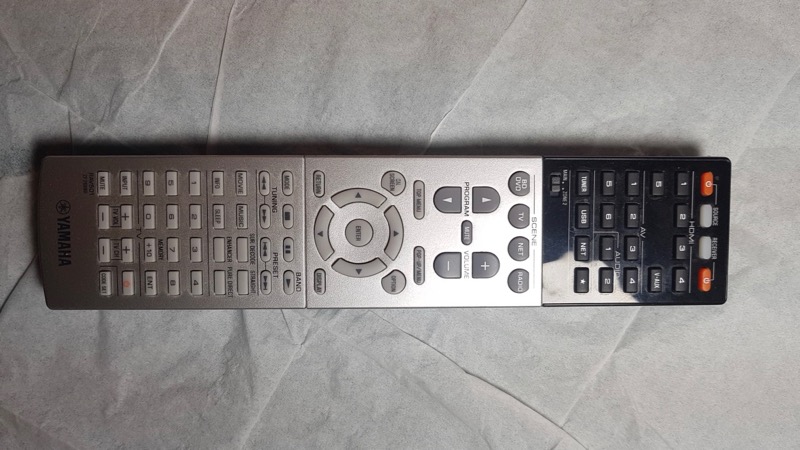
Do you have a Yamaha remote control with buttons that have stopped working to you are having to press too hard? Thinking about buying a new remote or sending yours away for service? Try this first it may save you time and cash.
Warning – a small sharp tipped screw driver or flat bladed tool is required to open the remote casing so be very careful to keep hand and fingers away in case it slips. Best place remote on a towel or cloth to stop it slipping and apply pressure gently keeping other hand well away from the tool tip.
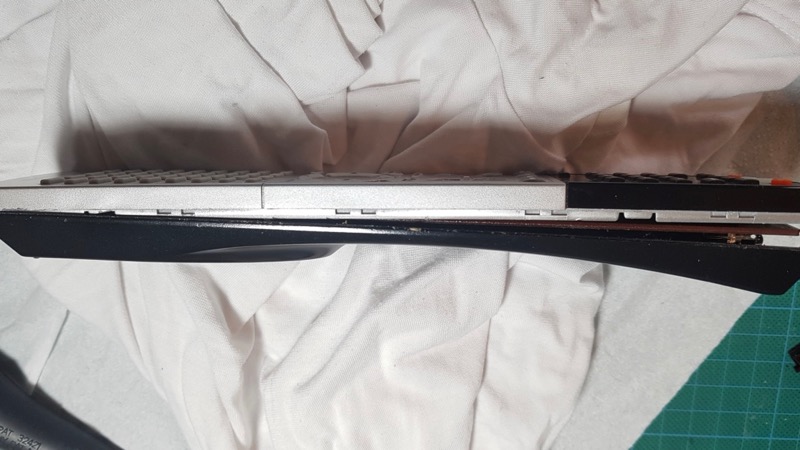
Google for remote control stuck buttons and you will find many posts saying how simple it is to fix. Well yes and no. Firstly it’s difficult to separate the top and bottom case to get inside – see the pictures below as a guide.
-

- Yamaha remote LHS part open
-
- Yamaha remote LHS showing clip points
-

- Yamaha remote showing dirty circuit board and buttons
-
- Yamaha remote cleaned buttons
-
- Yamaha remote control
First remove batteries and the small cross head screw inside the battery compartment. You’ll need a fine screwdriver – a watchmakers works well. Next try to separate the two halves of the case which are held together by small clips. Pushing down into the grove running around the case will ease them part. I found it easier to prise the case apart starting along the left side 2 cm from the top. Press down quite hard using a small flat screwdriver taking care not to slip and damage your hand or the remote! It needs firm pressure along with a twisting motion to lever the top and bottom apart. If your remote has a separate black plastic cover around the top buttons be careful not to prise this apart as it stays attached to the top half.
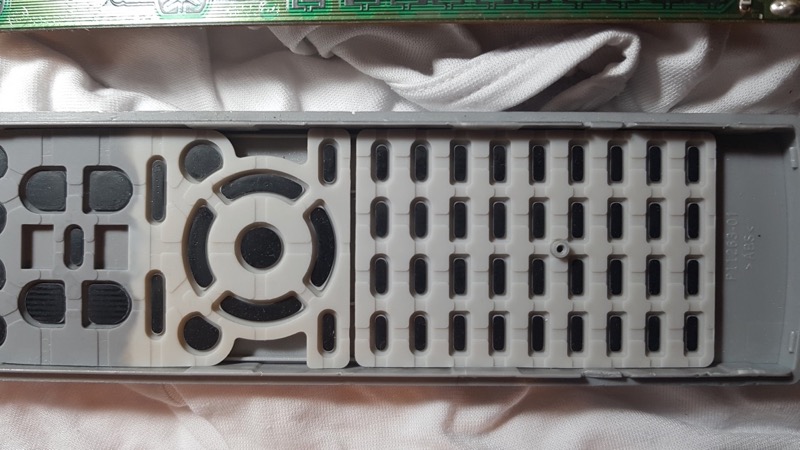
Notice in the photo two small slots spaced along the side that form part of the clip fixing the case together. Press down at these points. Work along one side pressing down and twisting to separate the two halves. It makes a clicking sound when it separates but should not break the clips. Then turn the remote over and start again along the other side.You may be able to pull the case apart after most of one side has separated. This allows access to the button pads and circuit board for cleaning. My remote had what looked like sticky orange juice spilled on it which stopped the volume and mute buttons from functioning. Looking at the pictures you can see the area covered and it’s amazing many buttons still worked!
The button pads are held in place on the top half by the rubber buttons themselves. I left these in place while cleaning the contact pads with warm water and allowing to dry out using a hair dryer to blow away any fibres from the cotton wool and cloth used. I also cleaned the circuit board using a cotton cloth dipped in warm water. Again let the board dry fully and ensure it’s free of lint / dust before reassembling.
I’ve seen other posts suggesting use of fine sandpaper on the button contacts. I did not need this – a simple clean with water was sufficient. The button’s carbon film contact is very thin and I’m not sure it’s good to use an abrasive as it will rub away easily and increase resistance. I’d also avoid solvent contact cleaners which contain oil that can make the pads sticky and fail. You could try an alcohol cleaner on the buttons if water does not remove whatever’s built up inside. The circuit board has a green varnish insulating the fine PCB tracks which can dissolve in some solvents like acetone so test a small area first. You don’t want to leave a film of varnish over the button contacts!
The top and bottom case simply click back together with firm pressure. Check the battery contacts are aligned through the bottom case so the circuit board lies flat. Also remember to insert the dark plastic filter for the IR LED at the front if it’s fallen out – it slots in place.
You should now have a working remote that needs light touch to operate the buttons!
14/01/2019 at 5:12 pm
I have same trouble will this work on my Sony remote?
14/01/2019 at 7:27 pm
Hi Otto – Expect Sony remotes come apart in similar way and cleaning inside should help. I don’t have a Sony remote to check how it opens – check if there’s a Youtube video that will show you.
30/03/2019 at 12:44 pm
Just want to say thanks Otto. Your info helped me to open the Yamaha remote of my RX-V673 amp without damage. After cleaning all the buttons are working normal again.
30/03/2019 at 1:07 pm
Thanks Vincent – glad to hear it worked!
24/10/2019 at 4:48 pm
Tried cleaning as you said and worked! Gone again on mute any ideas?
28/10/2019 at 6:12 pm
I bet the volume / mute buttons get most use so are probably worn. The wear reduces the contact conductivity so you press harder which makes it wear more. If you clean both pcb and rubber button contacts with mild detergent and dry and find its still not working tou could try a silver conductive paint on the button contact. Make sure paint well dried before assembly else it will permanently mute!
28/01/2021 at 10:31 pm
Thanks for the great guidance. I had tried to get the remote apart last week but couldn’t see how to open the 2 halves. Your instructions gave me the confidence to apply more brute force! There was a sticky black deposit under the volume key pads … I don’t think it had got in so perhaps the conducting pads had produced it. Any way, soap and water with a toothbrush did the trick and it is fully operational now.
Thanks again.
29/01/2021 at 12:02 am
Thanks for the feedback Tony, good to hear your remote’s working again. It’s surprising just how much force you need to prize them open. Original replacement remotes are either expensive if you can find them or the alternatives ‘one for all’ never seem to have the right buttons so repairing your original is best.
22/01/2022 at 2:07 pm
Great post Rick. I was just about to order a new quite expensive remote control for my RX-V673 due to the volume buttons not working anymore since about half a year. Then I came across this post with very clear instructions on how to clean the remote and yes that the trick!!!
Many thanks!
22/01/2022 at 3:01 pm
Thanks Geert, yes it’s worth trying before buying another remote!
06/10/2022 at 8:14 pm
Thanks you, alcohol, contact cleaner and remote as new
06/10/2022 at 9:10 pm
Good to hear your remote is working again.
20/04/2023 at 3:22 am
I used a 4 inch spackle knife to open and alcohol to clean. It was touchy putting back together but works after not doing so for years.
20/04/2023 at 7:47 pm
Had to google spackle knife but see it’s like a scraper so the long flat blade would work if you keep your hands well clear! I preferred to use a smaller tool, prizing carefully at each tab and levering apart to avoid stronger pressure that could slip and cause injury or damage the plastic tabs. Alcohol is a good solvent for greasy stuff that gets inside these remotes. But alcohol can dissolve the lacquer insulation on the circuit board so best applied just to the contact areas with a cotton bud. It may also remove some of the conductive film on the end of the rubber buttons. I’ll try a water alcohol mix next time after plain water with drop of detergent to see if it helps. Thanks for taking time to leave a comment – good to know you fixed the remote and not had to throw it away or buy another.